I’m slowly progressing on Kate’s new playroom, and my big purchase for the space was an IKEA 16-cube Expedit shelving unit, seen below when I first set it up:

The first look at Kate’s new playroom and our new IKEA Expedit empty and ready for fun!
I absolutely love the IKEA Expedit and highly recommend it to anyone interested in additional storage for their space. It’s relatively inexpensive, easy to assemble, study and great quality. I had previously purchased some different cube shelving for our living room toy storage, but the IKEA Expedit series is such better quality I wish I had gone with it in our living room, too. My only complaint with this unit in Kate’s playroom, however, is that she has so many little things needing storage – crayons, beads, stamps, etc. – that would be ridiculously frustrating difficult to find if I tossed them into a 13×13″ bin to fit the cube.
The whole point of a shelving system like this is to improve your organization – not create 16 separate bins of chaos!
I realized what I really wanted was the ability to use multiple smaller-sized bins in each cube without having to stack them (because stacking is the enemy of organization!) – and if that was going to happen, I needed to split some of these cubes up. I decided adding additional shelves to my Expedit was the plan and attempted to google my way to a solution, with no luck. Any tutorials I found were ridiculously complex, expensive, and/or required power tools we don’t own.
I knew I could do better.
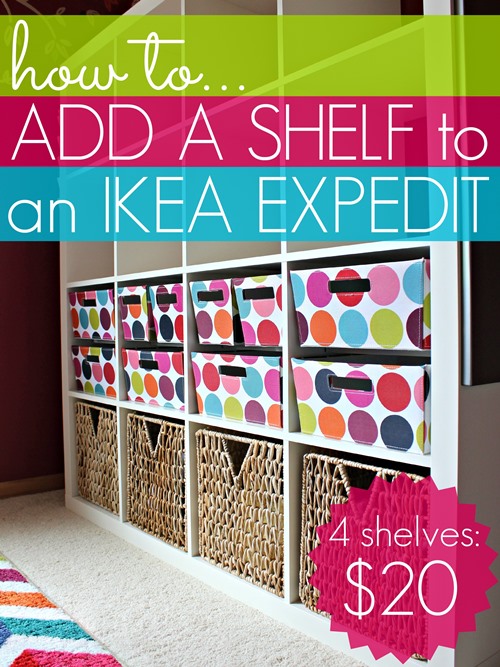
One trip to Home Depot with a browse through the hardware aisle, and I had my plan. Best of all – all the supplies I needed to add 4 extra shelves to my Expedit only cost me $20!
Supplies
Laminate Shelving
3/4″ Corner Braces (4 per shelf)
#6 x 1/2″ screws
Ruler
Level
Drill
Pencil
Here’s what the corner braces and screws look like that you will need:

IKEA Expedit Add a Shelf Hardware Supplies
The corner braces are what you’ll use to hold your shelf up, and keep in mind that you’ll need four of them (2 per side) for each shelf you’re installing.
I purchased inexpensive white laminate shelving (Rubbermaid’s Multipurpose Shelving) that was 8″ deep and long enough to make four 13″ shelves. IKEA Expedits are 15.25″ deep, but I didn’t want the newly inserted shelves to show because I knew the whites wouldn’t quite match up, so I opted to go with shelving that was only 8″ deep. Now that we’ve been using it for awhile I notice that the bins sometimes tip if you slide them in too far, so I’d recommend going with shelving that’s 10″ or 12″ deep for your project.
Lucky you – learning from my mistake!
To start, decide on the bins you’d like to use (make sure they all fit!) and then measure where your shelf needs to land, making two marks with your pencil (and using a level, if needed) on each side of the inside of the Expedit cube.

Use a ruler and pencil to mark where your shelf needs to go, making two marks on each side of the inside of the cube.
Consider the placement of each of your brackets and make sure they’re slightly different for the left side versus the right side to prevent drilling screws from each side into the same place. (That wouldn’t be good.) For example, I screwed all my front brackets on the left inside side of the cube 5″ from the front, and on the right side I placed them 5.5″ from the front.
Once you’ve screwed all four brackets in, this is what it’s going to look like:

Four corner brackets installed, just waiting for a shelf.
IKEA Expedit cubes are 13.25″ wide, but you’ll need to cut your shelves just shy of 13″ so they fit width-wise, accounting for the space the brackets take up on the insides. G cut our shelves, but if you don’t have a power saw you can ask the friendly folks where you purchase your shelving if they’ll do it for you – I’ve done this a few times and it’s always been an option!
Once your shelves are cut, you can just slide them into place! They’ll sit securely on the brackets, but if you’d like extra holding power you can drill screws into the shelf through the bottom of the brackets for added staying power (I didn’t feel the need to do this, but it is an option).

Ta-da!
Here’s a look at the depth of our shelves. I used an 8″ deep shelving board, but as I mentioned above, you can easily get away with (and I would recommend) something a little wider. In fact, I plan to buy a wider board the next time I’m at Home Depot to change ours out, but this gives you an idea of what to expect:

Hidden shelves added – bring on the extra bins!
We still have lots to do in this space, but it certainly doesn’t stop Kate from enjoying it already!

Kate, age 3

Who wants cupcakes?

